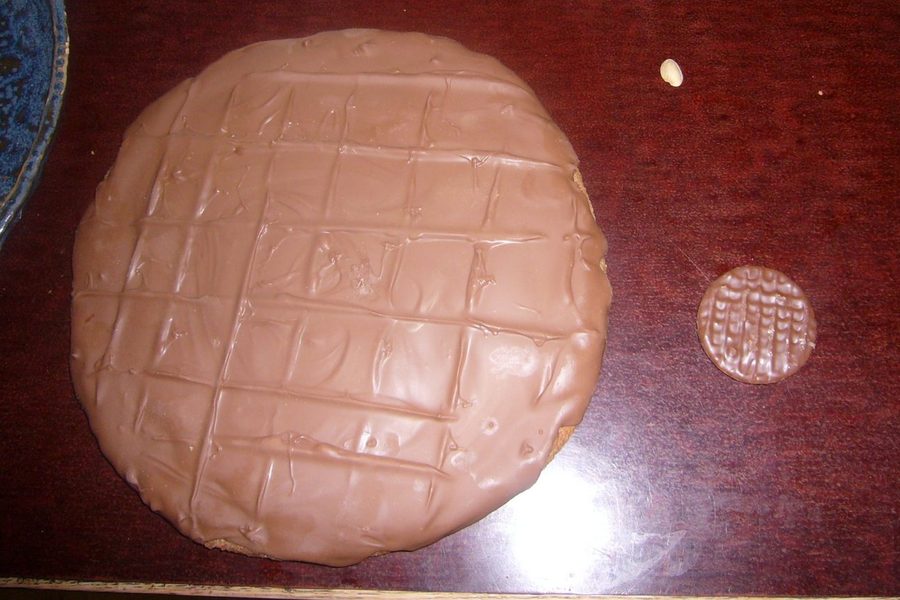
Bloomin’ Big Happy Face Biscuit
About this build
A giant smiling sandwich biscuit with a flower of buttercream and raspberry jam between two homemade biscuit discs.
Archive summary updated
Read the original account and photographs ↓
Notes from the contributor
Selected passages from the original account. Quantities may describe shopping, tests or the final build; follow the linked passage for its full context.
The ingredients for the whole biscuit were:
Read in context →
When all the flour was in, the mixture resembled a dough. I rolled out the dough and cut out a large circle (I used a dinner plate) and then baked it in the oven on a floured baking tray, gas 4, for about 30 mins until it was cooked.
Read in context →
Half a jar of Raspberry Jam (seedless) 500g Icing Sugar (for the filling) 800g Soft Marg or Butter (depending on finances of course) 300g Caster Sugar 1kg 50g Plain Flour
Read in context →
Bloomin’ Big Happy Face Biscuit: the archived recipe
Condensed from the original account by Carole H, published 2006-08-15. The quantities and method are the contributor’s; this is not a new kitchen test.
Ingredients recorded
- 600 g soft margarine or butter for the biscuits, 300 g per biscuit
- 300 g caster sugar, 150 g per biscuit
- 1 kg 50 g plain flour, 525 g per biscuit
- 200 g soft margarine for the filling
- 500 g icing sugar
- Half a jar of seedless raspberry jam
The account lists 800 g of margarine and 1 kg 50 g of flour in total and then gives the per-biscuit amounts used; this card shows both. The biscuit measured 27 cm across, was not weighed, and no cooling time is recorded.
Method recorded
- Make each biscuit separately. Beat 300 g margarine until soft, add 150 g caster sugar and beat until fluffy, then mix in 525 g plain flour a little at a time until it forms a dough.
- Roll out the dough and cut a large circle using a dinner plate as a template. Bake on a floured tray at gas mark 4 for about 30 minutes until cooked, then slide it carefully onto a rack to cool.
- Make the second biscuit the same way. Before baking it, cut a smiling face into the dough on the floured tray, copying one of the expressions from a packet of the original biscuits.
- Beat 200 g margarine with 500 g icing sugar for the filling and pipe or spoon it onto the plain biscuit in blobs arranged like a flower, as the original biscuit is filled.
- Spoon the jam into the middle of the flower and carefully place the face biscuit on top.
Archive guides · Explore projects
The original account
I must admit, I hadn’t heard of this site until I saw the segment about it on the F-Word, but after I checked it out I couldn’t get the thought of massive biscuits out of my head.
As a woman and a mother I know a LOT about biscuits, mostly how to devour a whole packet in one go, so I decided to go on a mission and pimp a massive biscuit of my very own – it’s a mother’s job, right?
But what could I make? Trawling through my cupboards I came across the perfect subject, a Jacob’s Happy Face Biscuit – a favourite of both mine and my children’s.
The ingredients for the whole biscuit were:
Half a jar of Raspberry Jam (seedless)
500g Icing Sugar (for the filling)
800g Soft Marg or Butter (depending on finances of course)
300g Caster Sugar
1kg 50g Plain Flour

Total cost: About £5
I decided to make the biscuit mixture in two halves, so if the 1st lot went wrong I would only be wasting half the mixture.
To make each biscuit I put 300g marg into a bowl and beat until soft, then I added 150g of caster sugar and I beated it again until it was fluffy (i.e. you cant tell the difference between the marg and the sugar). Finally I mixed in 525g of plain flour, a bit at a time (and although, as a mother, I encouraged my 7 year old to have a go at the mixing, maybe this wasn’t the right time cos she/the kitchen/me ended up like a snow storm!!)


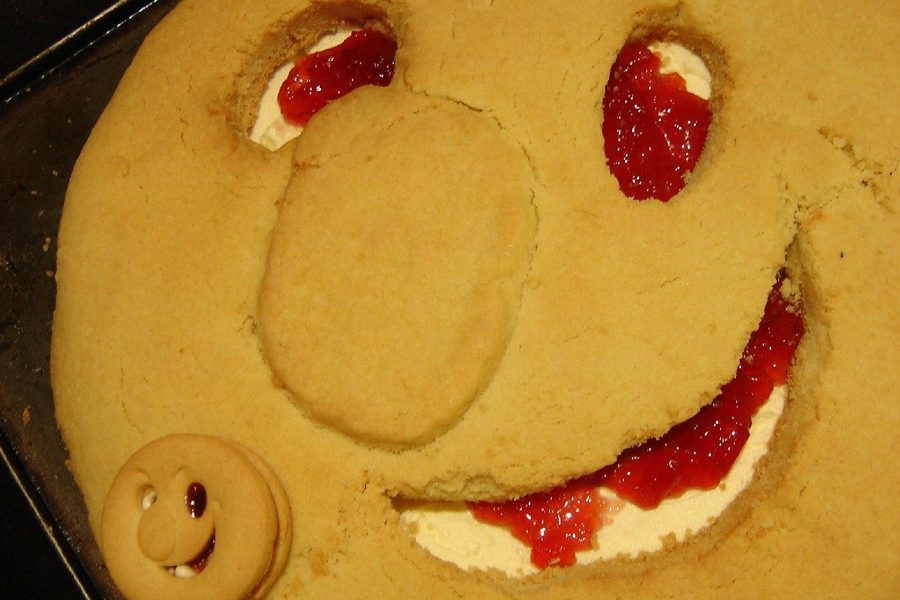
When all the flour was in, the mixture resembled a dough. I rolled out the dough and cut out a large circle (I used a dinner plate) and then baked it in the oven on a floured baking tray, gas 4, for about 30 mins until it was cooked.

When it was cooked I carefully, I mean REALLY carefully slid the biscuit onto a wire rack to cool and then made the 2nd batch of dough in exactly the same way.
Now, I decided to use a real Happy Face Biscuit to copy a face from, so I bought a packet of the biscuits. But it wasn’t until I opened the pack that I (and my 7 year old assistant) realised that there are 6 different expressions to choose from!!! What a dilema!!!

A couple are cute with hair etc but a couple others were downright scary – my 7 year old said they would give her nightmares, so I ate those to save her from the trauma they may have caused (I’m good like that).
Anyhow, with the help of a few ‘Funmums’, I decided on the Happy Face that looked the happiest and carefully cut the face out of the dough (after I had transferred it to a floured baking tray) and I must admit, it looked pretty good. I then cooked the biscuit in exactly the same way as the 1st biscuit.

Then after both halves had cooled I made the icing (200g soft marg and 500g icing sugar mixed together) and I split an original biscuit to see exactly how it was spread inside and I was amazed to see it was in little blobs, like a pretty flower pattern, so i did the same (on a larger scale of course).

I then finished the filling off by putting jam in the middle of the flower and carefully placing the ‘face’ biscuit on the top (being careful not to break the face in the process because this would have been a disaster).

Then it was finished! I had done it! Created the ultimate ‘pimped’ master-piece – the Bloomin Big Happy Face Biscuit which I named ‘Dunk-an’!!! He measured a massive 27cms in diameter and weighed a lot (forgot to weigh him!)
I did it in the name of all Funmums out there and of course for the enjoyment/entertainment of my children (as any good mother would). When ‘Dunk-an’ was finished I felt like I had created another child of my own – so you can imagine my devistation when my husband cut him into bits – mind you, HE TASTED GOOOOOD!!!