Two Foot Trio
Weight: 9.5kg
Size: 2 foot long
Calories: est. 53,286 cal
Cost: est. £26.82
Ingredients:
45x 100g bars milk chocolate
Shortbread – 1500g margarine
660g caster sugar
2160g plain flour
Caramel – 1440g margarine
1440g soft brown sugar
1440ml sweetened condensed milk
360ml golden syrup
With pimp #1 under my belt (see Jammie Dodger http://www.pimpthatsnack.com/project/395/) it was time for another. I wanted to go for something chocolatey this time and something bigger! Looking through the snackabase, there were lots of classic chocolate bars for sure, but they had all been done before. I wanted something new, something original. A short brain storming session later it came to me like an angels light shining down from the heavens. It was a chocolate bar of time passed, last seen around 6 years ago back in 2003. It was made by Jacobs and had a very catchy TV advert, starring a little spoilt girl who really wanted one of these chocolate bars (and she wanted it now!). The original TV advert can be found at http://www.youtube.com/watch?v=U-V-KCY7SMU for all you nostalgic folk. So, the seed had been planted for the next pimp. Let us begin shall we?
There were a few things which worried me about the process for creating this one; the custom mould which was needed to shape the bar, the Trio lettering on top of each segment and the toffee flavoured filling. I had done several “tests” on creating the toffee filling, firstly creating it all from scratch using butter, sugar and condensed milk but I didn’t have much luck with this method, either ending up with something so hard it would break your teeth, or something which was just too sticky. I then had the thought of using something which already existed and modifying it slightly. I came up with “caramac” chocolate bars, melted down and mixed with condensed milk so when it cooled it didn’t harden fully. I wanted something solid but not hard and yet not sticky at the same time. This worked very well indeed and had the taste of perfection!
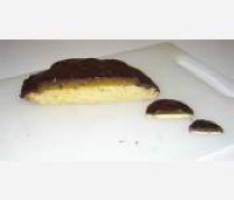
I set about creating a smaller version of the Trio first to see how the chocolate bar shape would turn out using a cardboard mould. I lined the mould with cling film to help when getting it out of the mould. In the end the mould worked fairly well with a little tidying up and smoothing down required once removed. I also discovered that putting the chocolate into the freezer to set quicker was not a good idea as the chocolate had white patches all over it, due to the rapid change in temperature.

Overall the test yielded a promising result and gave some good guidelines on how much of each of the ingredients were needed for the full size pimp.
When calculating how many caramac bars was needed for the two foot Trio, the cost came to almost £30!!! So I decided to go back to the original method of creating it from scratch. A few more tests were done and finally an acceptable result was found.

An initial trip to the local supermarket was made to get the ingredients required. I only bought 10 bars of chocolate to start with (so as to not look like too big a freak at the checkout). I estimated I’d need around 20-30 100g bars! Besides they didn’t have that many in the store!

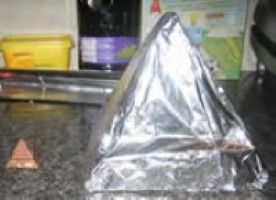
First step was to make the mould. This was done by hacking up a large cardboard box and held together by brown sticky tape. Three squares of cardboard (2 layers thick) were made to create the indent in the top of each segment. I decided not to line the mould with cling film this time and see if that would give a smoother finish.

The corners of the mould had some small cracks where the sides met so some kind of filler had to be made. A nice mixture of flour of water provided a neat (non toxic) solution.

I went with the shortbread biscuit first. With the oven not being large enough to fit the full sized biscuit in, I had to create it in two halves, just as well really as it turned out I wouldn’t have had a bowl big enough to mix the dough. First, an artery clogging amount of butter was emptied into a bowl. To this was added a diabetes inducing amount of caster sugar. The mixture was beaten to submission until pale and creamy.

A sackful of flour was next to go into the frey. This was sifted and added gradually with each addition folded carefully into the sugary fat mixture. This was hard work towards the end and the spoon was ditched in favour of bare knuckles.

Once done and the lactic acid had subsided from my arms, the dough was turned out onto a floured surface. A short pounding later it started to resemble a rectangular shape of correct proportions. This was transferred onto a buttered baking sheet and the obligatory dents were embedded at regular intervals. I believe this is to help the adhesion of whatever is placed on top (in this case toffee flavour filling) but I couldn’t see the filling moving anywhere, not once encased in chocolate anyway, but nevertheless they were added.

Cooking times for this were pure guess work. The original recipe called for 15-20 minutes at 190c. After an hour I took it out of the oven and trimmed the sides to give it a more rectangular look. The edges were nicely cooked but the middle still too raw. I couldn’t afford to put it back in the oven though as it was already starting to brown and I didn’t want it burned. I ended up wrapping it in foil and cranking up the heat to 210c for another 30 minutes. Out it came and it still wasn’t quite done! I lowered the heat back to 190c and wrapped it back in foil and put it back in for another 20 minutes. After this I called it done. Almost 2 hours in total!
Then I had to do it all again for the other half…
Next step was to make the 3 caramel squares which sit atop the shortbread biscuit. All the ingredient were put into a large saucepan and whacked onto the stove on a medium heat. Once all the butter had melted and the ingredients well blended, the heat was increased to boil the caramel. Extreme care has to be taken with boiling caramel, as skin contact with this molten liquid can be very painful (trust me!). Once boiled for a few minutes, remove from the heat and allow to cool for 5 minutes. Then transfer to a glass bowl or suitable container (nothing plastic as it’s still bloody hot!).

Allow to cool further before transferring to the fridge overnight. Once completely set, remove from the fridge and scoop out from the bowl onto a sheet of cling film. Place another sheet of cling film on top and squash down into a rectangular shape of correct proportions. I then placed this into the freezer until I was ready to assemble the chocolate bar. Repeat this process for the other 2 caramel squares.

Now is the time to start the assembly. Melt some of the chocolate (I did 5 bars at a time and used the bain marie method of a glass bowl containing the chocolate sat on top of a pan of boiling water. The bowl should not be touching the water and the steam from the boiling water is what melts the chocolate.

Pour the melted chocolate into the mould so it covers the 3 cardboard squares (used for the inset) in the bottom of the mould. It should cover the 3 squares by around 5mm.

Allow the chocolate to set in a cool place. Once set, take the caramel squares out of the freezer and add on top of the chocolate, spaced equally apart. Add more melted chocolate around the sides of the caramel squares.

You can now add the shortbread on top of the chocolate/caramel layer.

Keep melting more and more chocolate and adding to the mould until the shortbread is covered by 10mm of chocolate. Allow to set completely in a cool place.

Now we can remove the mould from the set chocolate.

For the “Trio” logo, we melt more chocolate and pour onto some tin foil and spread to a thickness of around 4-5mm and allow to set. Once set carve out the logo. I used various shaped cookie cutters to nibble away bits of chocolate gradually until I had the finished logo. Repeat this so you have 3 logo’s in total.

Using a hairdryer melt the chocolate slightly on the 3 inset squares and push the 3 logo’s into the inset areas. Allow to set again.

The finished bar was then wrapped in gold wrapping paper. The sleeve was created from a scanned actual wrapper found on the internet and cleaned up using photoshop/illustrator and printed out onto card.

And here is the final product being modelled by my good self.

The chocolate bar was not as difficult to cut as first anticipated and here we have the cross section shot.

The Two foot Trio even made it into the local newspaper http://www.thetelegraphandargus.co.uk/news/local/localbrad/4348236.Crumbs__This_snack_takes_the_biscuit_/
And that is that. Until next time. Happy pimping.