Giant KitKat
Having marvelled at the wonders on pimpthatsnck.com for a while now,
we decided that it was about time we tried to do a pimp for
ourselves. so, on the approach of our identical twin friend’s 30th
birthday party, it seemed only right to substitute their more
traditional birthday cake with a very very very large kit kat…
First off, the ingredients:
12 bars of chocolate weighing 200g each (we actually ended up using a
Further 400g in the end! – that’s 2.8kg)
3 boxes of ice cream wafers
1 bag of coco rice cereal
and
A jar of chocolate spread

Estimated cost: about £13
The next thing to do was to make a mould for the chocolate. We did
this using thick cardboard. and a whole lot of sticky tape:
The logo was cut out of card in reverse and stuck into place inside
the mould.

Then came the really difficult bit – lining the damn thing!
We started to do this with foil, but found this was ripping when we
tried to fit it in around the smaller details of the mould.

Eventually we just decided to cover the sides in foil and then put a
layer of cling film around the bottom, hoping that the weight of the
chocolate would be enough to push it down around the mould for the logo.
(with hindsight, it would probably would have been best to cover each
piece of the mould individually in foil before sticking it all
together and then grease that slightly with melted butter before
adding any of the ingredients – although this probably would have
taken us about another three years to complete!)
We filled the mould first with a thick layer of chocolate first and
let that set in the freezer (the mould could just fit in there if we
took out the basket at the bottom).
Then when this had all hardened, we started filling the inside of
the bars with layers of wafer and a mixture of chocolate spread and
rice cereal which was the nearest thing we could think of to get the
correct texture for the inside filling.

Once the bars had been completely filled with the layers, we finished
off by filling up the rest of the mould with melted chocolate and
left it all to set again.

When we were sure all the chocolate had gone hard, we removed the
bars from the mould. this was a bit of a mission as we found that the
cling film had been set right into the chocolate in some places. we
had to use more melted chocolate to fill in some of the gaps and
smooth bits over, but on the whole it was looking pretty cool.
the logo didn’t show up in the top of the bars as much as we had
hoped due to the dodgy cling film, but the words were still clearly visible.
Here’s a shot of our kit kat next to a regular sized version:

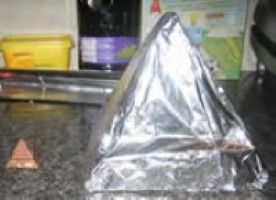
Then we wrapped the chocolate in foil and a giant wrapper:

And presented it to the birthday boys:

The giant kit kat weighed a colossal 3.5kg in the end and was much
enjoyed by all at the party with plenty to spare…
I hope you have enjoyed looking at the photos as much as we felt sick
having eaten such a ridiculous amount of chocolate and wrongness!!